This process assumes you have a SendGrid account and you have already added and verified your Sender Identity.
Step 1 - Login to your SendGrid Account
Step 2 - Access your Domain's or Sender Email Address's SMTP Settings https://app.sendgrid.com/guide/integrate
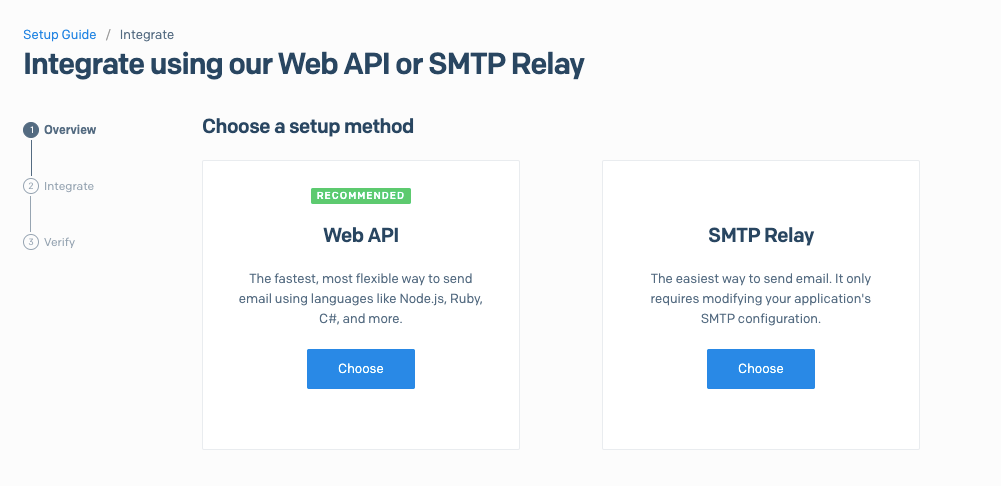
Step 3 - Select SMTP Relay - https://app.sendgrid.com/guide/integrate/langs/smtp
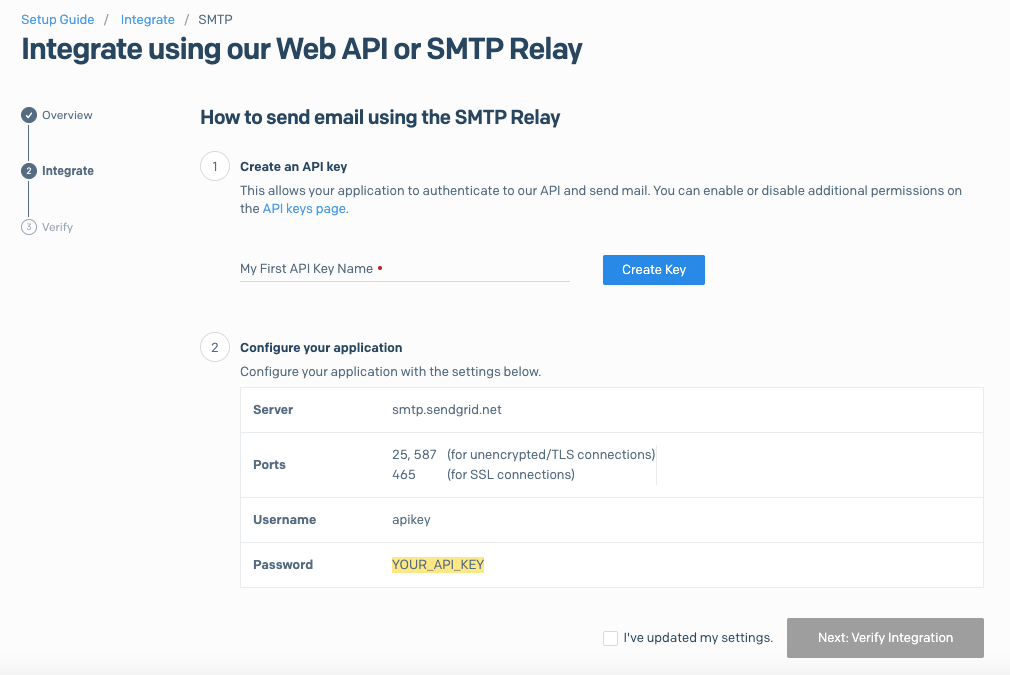
Step 4 - Create an API Key - > API Key name is like your “password” you will use, enter a friendly and recognizable name under “My first API Key Name” and click on “Create” button.
Step 5 - An API Key will be generated, please “Copy” and save this in a notepad or word document, as you will need to enter this in Let’s Calendar’s SMTP Settings.
Step 6 - Configure your application – Please copy over all the settings mentioned in this section, you need to copy –
a. Server - smtp.sendgrid.net
b. Ports - 25, 587 when you select TLS or 465 for SSL connections
c. Username – copy what is displayed - apikey
d. Password – Copy the password shown over here, this is same as the API Key you have created in Step 1 of SMTP process
Note - This is the only time SendGrid will display the “password” or API key to you, so this needs to be saved confidentially with you. You will need this password/API Key for settings at Let's Calendar's SMTP settings.
Step 7 - Proceed to Let’s Calendar's SMTP settings, WITHOUT closing this browser window, leave it where you are, and then return back over here once Let’s Calendar SMTP settings are entered.