Step 1 - Create your Free or Paid MAilGun account by going over to www.mailgun.com.
Step 2 - Add your domain and verify the same by going to - https://app.mailgun.com/app/sending/domains
Step 3 - Add required details at your DNS level as per MailGun's guidelines and complete the domain setup.
Step 4 - Complete necessary verification to ensure your domain now appears verified and ready to use in MailGun
Step 5 - Login to your MailGun Account
Step 6 - Access your Domain's or Sender Email Address's SMTP Settings by accessing the left menu -> Sending -> Domain Settings

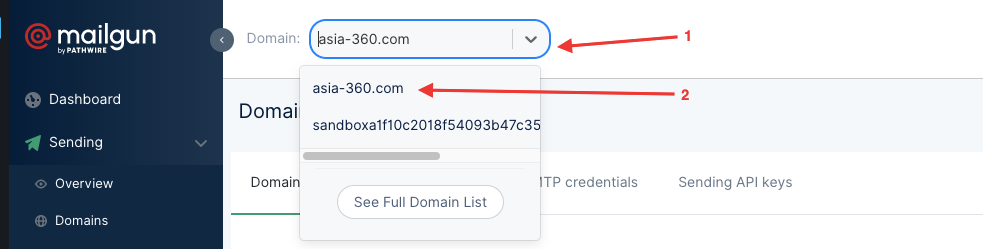
Step 7 - Select the domain you want to use with Let's Calendar from the top menu
Step 8 - Select SMTP Credentials and then click on "Add new SMTP user"

Step 9 - Add the "Sending Email Address" over here, this should same as what you want to reflect in your audience's inbox as "From email address. Pick something your audience is familiar with. Note: You will use this same email address in Let's Calendar later.

Step 10 - Copy SMTP Details - Now copy over the following SMTP details from SMTP Settings, note: your SMTP password will appear in a small pop up box in bottom right, please press "copy" and paste it in a notepad. Keep the notepad open for remaining details to be copied from SMTP settings as under -
SMTP Server - smtp.mailgun.org (Or what's displayed under
Port - 25 or 587 when you select "Encryption = SSL" OR 465 when you select "Encryption = TSL"
Userid/Email address = the email address you entered in "New SMT Credentials" e.g. webinars@domain.com
Password = already copied
Step 11 - Now head over to Let's Calendar's SMTP settings to add these over