Assuming you have already created your Elastic Email account, added a sender and created your SMTP API User and copied over all the SMTP Information from your Elastic Email account, this article will guide you on how to enter Elastic Email SMTP settings over at Let's Calendar SMTP setup.
Step 1 - Login to your Let’s Calendar account and navigate to Settings -> SMTP Config
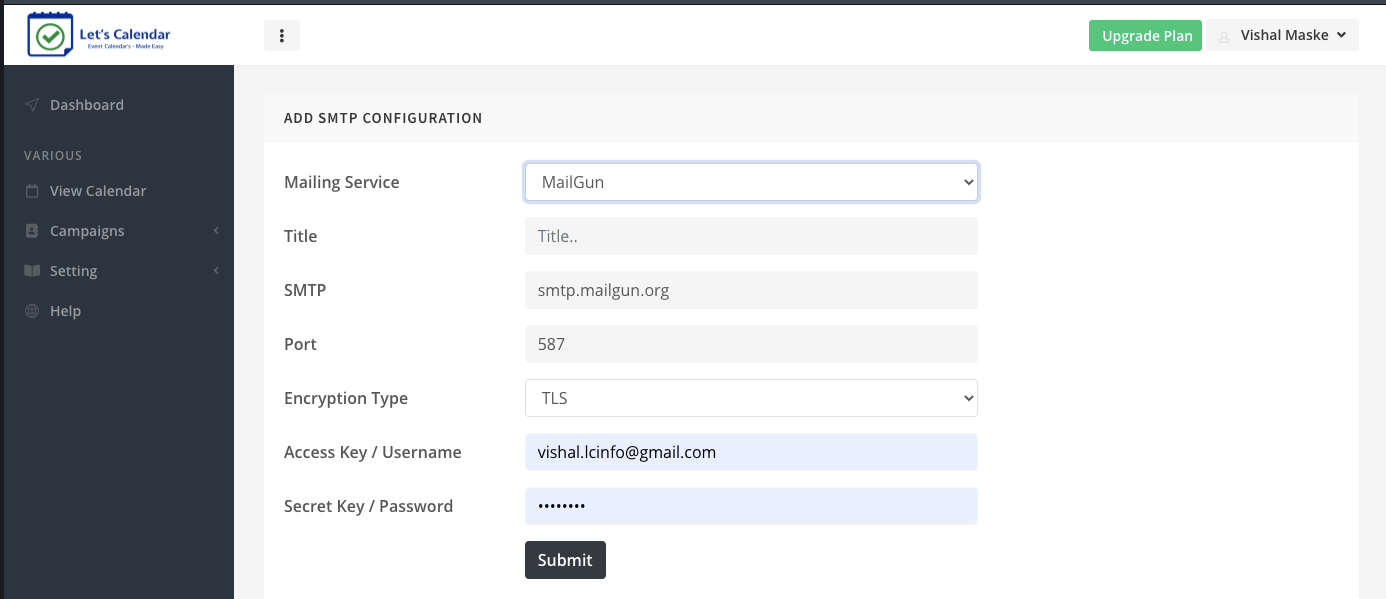
Step 2 - Select “Elastic Email” under Mailing service and set it up with following details -
Step 3 - Title – Give a friendly title typically your domain / sending name related so you can identify easily e.g. Info @ Let’s Calendar (Elastic Email)
Step 4 - Now rest settings we need to enter as per what we copied over from Elastic Email's SMTP Settings -
a. SMTP – this should be pre-filled as smtp.elasticemail.com, if not enter the same or enter the info that was displayed to you by Elastic Email
b. Port – 2525 (OR as displayed to you by Elastic Email)
c. Encryption Type – SSL (If you change this to TSL, then be sure to change the port to 465)
d. Access key / Username – Userid you created in Elastic Email SMTP settings
e. Secret Key / Password – This should be same as the password you generated in Elastic Emails' SMTP settings and have copied safely.
f. Click on “Submit” - You should get a message SMTP Config Created Successfully!
Step 5 - Now navigate to “Settings” and “Domain Email” to now configure your “Sending identity”
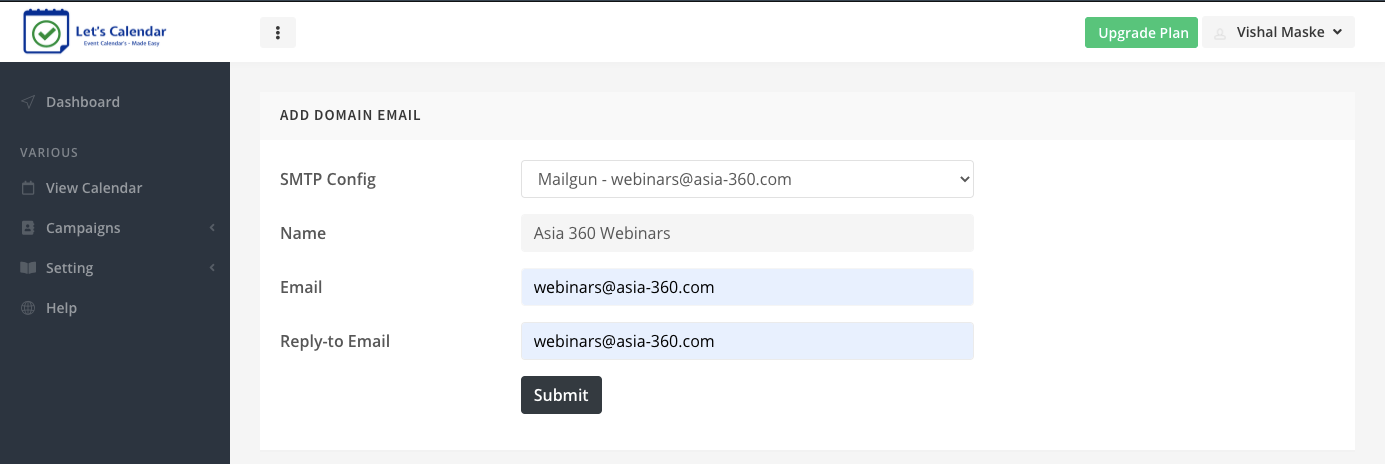
Step 6 - Under SMTP config drop down, select the SMTP you just now configured.
Step 7 - Enter the “Senders Name”, this should be same as what you want your users to see when they receive calendar invite's from you.
Step 8 - Next, Enter Sender Email ID and Reply-to Email id – enter same as that you entered in Elastic Email.
Step 9 - Click “Submit” and you should get a message “Domain Email Created Successfully.”
Step 10 - You have successfully configured your SMTP settings with Elastic Email, next would be to test out the configuration by sending a test calendar invite.