Step 1 - Head over to https://app.mailjet.com/signup and signup for a free or paid account
Step 2 - Please follow on-screen instructions to complete your account setup
Step 3 - Head over to Manage Sender Addresses to Edit/Add a new sending address - https://app.mailjet.com/account/sender
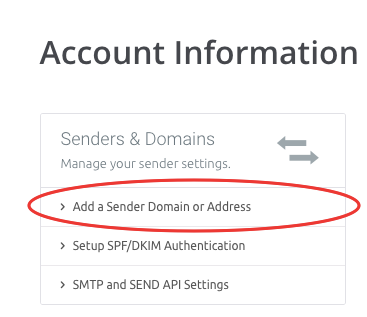
Step 4 - Now you have two options,
a. Verify a domain - and thus you can use any email address associated with the domain, Note: requires DNS level change so you need to have access to your domain DNS control panel
b. Verify just an email id - and you can only use this email id to send your campaigns, Note: Does not require any DNS level changes. You will need to add and verify any new email IDs before you can use them in Let's Calendar.
Step 5 - Follow on-screen instructions to Add and Verify your Email id / domain
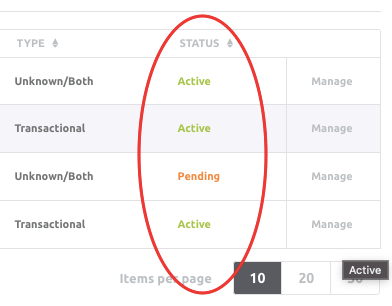
Step 6 - Ensure the "Status" column for whichever option you selected shows "Active" and not "Pending"
Step 7 - Head back to Accounts and now select SMTP and Send API Settings

Step 8 - Copy the following information being displayed under "Credentials and Configuration" from this page -
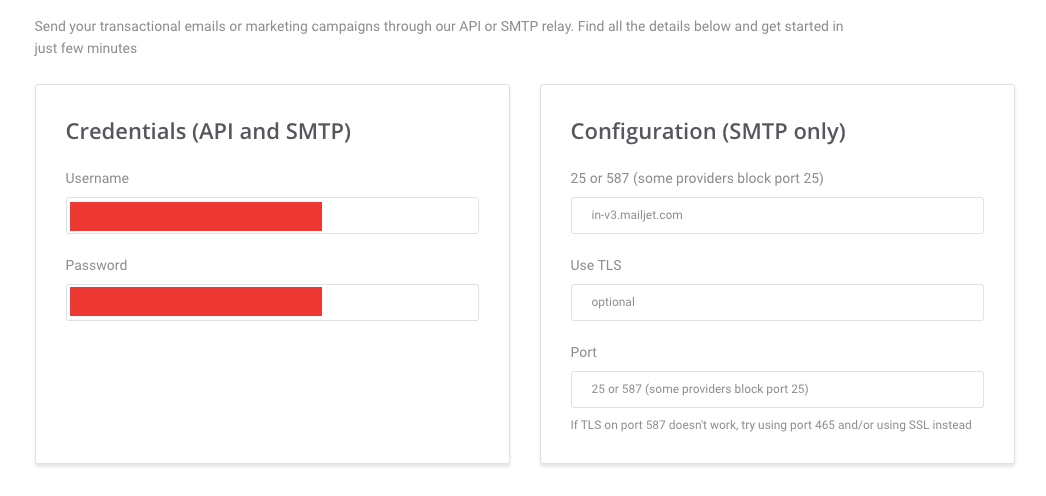
SMTP URL - in-v3.mailjet.com
Port - 25 or 587 (some providers block port 25, If TLS on port 587 doesn't work, try using port 465 and/or using SSL instead)
Use TSL - Optional
Username - As displayed
Password - As displayed
Note: Kindly save above information somewhere safe as you will need this to link Mailjet with Let's Calendar
Next: Login to Let's Calendar and Setup Maijet as your SMTP server